Wednesday, January 3, 2007

Customizing Jackets

*This post originally appeared on derangeddesigns.com. In 2018 I moved it to this blog and backdated it to the approximate date that it was first posted. 

I get a lot of requests for jackets or vests that are studded, patched, and painted with band logos. I don't do this level of custom work, so here are some ideas to help you if you don't know where to start. Pictures are at the bottom of the page.

Start with a plain jacket: you can use one that you already have, make one, or buy one. Look in your closet. You might find an old jacket that would be perfect to alter. If you don't have a sewing machine or very much money to spend, you can usually find a denim jacket at a thrift store for under $10. If you have more money to spend, you can find a jacket online. Deranged Designs sells Cotton Moto Jackets and Faux Leather Moto Jackets that are great for customizing.

Customize it! You can add tons of stuff to a jacket to make it your own:

  • Pins/buttons: these fall off easily so put them on the collar or towards the top of the front of your jacket.
  • Studs: there are many different kinds of studs you can use, and you can usually put them in by hand. It can be really hard to put studs through leather or thick fabric, so try poking holes through the fabric first with a large needle or awl. (Another tip: do research before you buy a special "stud awl" for studs, they are sometimes made cheaply and the blades will bend easily.) Studs can be difficult to line up perfectly, so you might want to practice on something besides your jacket. I hate putting studs on things so I can't offer any further tips.
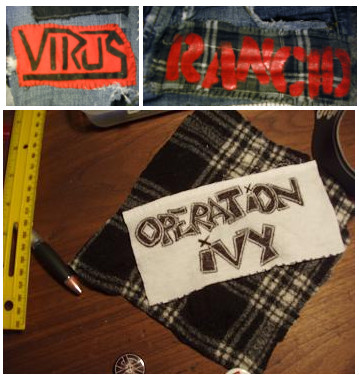
  • Patches: you can make your own patches with fabric paint (I have a DIY guide for it) or buy them. They fray easily so you'll have to sew them on well. You can use a sewing machine to sew on most patches, but if you are going to put any on the sleeves you will have to hand sew them. Deranged Designs sells patches and you can request to have the edges serged before they are shipped to you. (Serging cuts off the uneven edge and sews around it to minimize fraying.)
  • Other ideas: sew random scraps of cool looking fabric on the collar, sleeves, or anywhere else you want. Paint band logos directly on to the jacket, or paint other designs all over. Sew zippers on your jacket. Add pockets. Use an old t-shirt as a back patch. Be creative!
Where to buy supplies for your jacket:

Zippers, fabric, and fabric paint:
  • your local fabric store (for example Jo-Ann)
  • thrift stores: buy a cheap pair of pants or shirt, cut it up and add the fabric to your jacket
  • fabric.com
  • eBay


Making Patches

*This post originally appeared on derangeddesigns.com. In 2018 I moved it to this blog and backdated it to the approximate date that it was first posted. 

I used to make a lot of my own punk rock patches. Here are some tips and ideas.

Fabric Paint
I always use fabric paint to make patches. My favorite brand is Tulip Soft Washable Fabric Paint. It's thick and you don't need many coats to cover up dark fabric. I've also tried to use puffy paint, nail polish, and white-out, but they don't work very well. Puffy paint is too thin when you brush it on, and nail polish and white-out will soak into the fabric and cause problems.


Fabric
The best type of fabric to use for patches is canvas, or anything that is thick and not very stretchy. You can get it at a fabric store or cut patches of fabric out of old clothing. Weird prints like plaid, stripes, and polka dots can also be used to make patches.


Stencils
If you can't draw or paint very well, you'll need stencils. You can buy a pack of simple letter stencils from a craft store or you can print and cut out your own band logo stencils. (StencilPunks.org has a great selection) To make stencils that don't fall apart, print them out on a regular sheet of paper, then tape or glue the paper to a piece of cardboard or something else that is thick enough not to rip easily. Then cut out the stencil with scissors or a razor blade.


Spraypaint
Spraypaint is a quick and easy way to paint over stencils, but first test the stencil a couple times because it might bleed into the wrong areas of the fabric. It also doesn't last as long as fabric paint.


Iron-On Transfer Paper
This is a really bad way to make patches or t-shirts. It seems like it will work great, because all you do is print out your image on to the transfer paper and iron it on, but they don't last very long. If you do use them, you should only iron them on non-stretch fabric (not t-shirts) and add a coat of clear spray paint so the image won't chip off as fast. Transfer paper should cost only a little over a dollar a sheet.


Screenprinting
I've never tried screenprinting, but if you want to learn there are lots of other websites that can show you how. For a screenprinting tutorial, click here.


More Ideas
Stencils and paint can also be used on your purse, boots, backpack, furniture, walls, clothes, etc.


Pictures:


The Conflict patch stencil was printed out from StencilPunks. The Rancid patch made with no stencil, and I used nail polish for it, which was a nightmare! Fabric paint for the Misfits pants mixed with glitter. The Virus patch was made by my friend Casey and the bottom Rancid patch was made with separate letter stencils. The Operation Ivy patch was sent in from Kevin. 


The Aus-Rotten and Dead Kennedys logos were done freehand, for the rest I used stencils. The first Lower Class Brats picture is a skirt that I painted with white puffy paint, and it didn't show up very well. The second LCB picture is a t-shirt that I made a while ago with an iron on transfer. It started to disintegrate off of the shirt, and I couldn't wash it anymore so I stopped wearing it. The second Unseen picture is my high school backpack. School can be pretty boring if you don't have any sharpies. 


This is Casey's jacket. I think I'm going to go to Texas and steal it from her. 

No Sew DIY

*This post originally appeared on derangeddesigns.com. In 2018 I moved it to this blog and backdated it to the approximate date that it was first posted. 

When I first started altering my clothes I didn't know how to sew. If you think DIY-ing your clothes sounds fun, but don't want to invest in a sewing machine, here are some ideas for you.

Fabric Paint

You can do tons of things with fabric paint, even if you don't have any painting skills. What I used to do a lot was completely cover my hands in paint, then rub them all over skirts and pants and other things. It creates a really cool splotchy design. You can also:


  • Use stencils. You can make band logo stencils to decorate your clothes, or you can use letter stencils to say something. Quoting your favorite bands can be fun too. I once stenciled "Fight War, Not Wars" (from Crass) on the back of a plain red shirt.
  • Paint stripes all over your clothes. You can draw them on first with a pencil or just do it really sloppy.
  • Paint skeleton bones on something, like you see on Halloween costumes. (for example, arm bones, leg bones, ribcages, etc.)
  • Use red paint to make it look like blood. I did this with a Dawn of the Dead mini skirt.
  • Don't only use paintbrushes. I've used the eraser ends of pencils to paint words. It makes letters look really cool. You can also paint different things to make cool stamps, or you can buy your own stamps. I've used the bottom of a thread spool before as a stamp.
  • Buy spray paint and splatter it on. With some spray cans you can tap the button just a little and the paint will drip out instead spray.
  • You can also use bleach instead of fabric paint, but be careful. If you use a lot, your clothes will eventually fall apart. Also, not all fabrics can be bleached.
  • Print out random shapes and cut them out to make stencils. This is really easy to make a skull and crossbones design.

    Here are some examples of fabric paint ideas:


  • Yarn
    You can use yarn to create awesome designs on your clothes. Just buy a really big needle, thread it with some brightly colored yarn, and start sewing. Here are some examples:


    T-Shirts

    There are a million things you can do with big band shirts without sewing them. I'm actually not too good at this, but here are some other sites that have some great t-shirt DIY ideas:


  • WhatTheCraft.com has a great no sew halter top tutorial
  • Generation-T.com has two easy t-shirt projects
  • OhMyStars.net has at least 15 amazing t-shirt ideas

    Scissors
  • You can do tons of things with just a pair of scissors. Use fabric scissors, or at least the sharpest you can find. If cutting fabric is difficult, you are using the wrong kind.
  • Frays-denim is the best fabric to fray. Just cut it and throw it in the wash. But don't try to make the seams frayed. I once slashed a pair of jeans all over the seams with an x-acto knife, and after a while they completely fell apart. I now use patches and dental floss to hold them together.
  • Slashes-cut slashes in your boring shirt, tights, sleeves, or anything else. This works great with stretch fabrics that won't fray. After you cut slashes all over something, wear a different layer under it. T-shirts and tights can look really interesting this way. You can also cut slashes all over a pair of pants or skirt and wear brightly colored tights underneath. Make the slashes really even and neat, or random and all over the place.